So you have followed the project, bought into the concept of a very slick car being made out of the pedestrian jetta sedan, you have an old donor, and you are ready to start the beheading. Lets go.
 |
| most of the parts that come off the car |
|
What has to come out before you start with the saws all:
The cuts are simple but you have to clear out a few things so you don't hit them with the big saw. Most of these items have to be removed to build the g3f anyway so there isn't much duplicated work.
Environmental tip: While the car is together and mobile have an air conditioning shop drain the refrigerant/oil from the a/c system. If they have a mobile system great but most need to have the car for 15 mins to do the job, this is so much easier when the car is mobile.
1. The seats front and rear need to come out. Follow the bentley manual and pay particular attention to the instructions regarding air bags.
In each front seat there is an airbag on the outer side...disconnect the battery on the car and make sure all the harness plugs are removed from the seat before you fiddle.
 |
| the final result of the rough cut |
The rear seats are much easier just follow the book...no air bags.
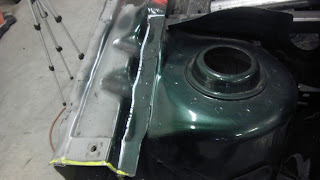
2. Remove the rear axle and fuel tank. Follow the bentley. Keep all the brake lines in tact if you can but separate them from the body metal clips and the calipers so that a cutting saw can't hit them...we will be cutting under the rear seat area where the fuel tank is. The fuel lines have special connectors on the ends...there is a button you push to release the line from the joint...don't force this...you either press the right button and they slide away or you are doing it wrong...good pics in the bentley..go slow here as it is a royal pain to replace the lines.
3. The aluminum heat shields and the exhaust also come down. This clears up the underside of the car all the way to the engine up front.
 |
| the nose with the engine still in |
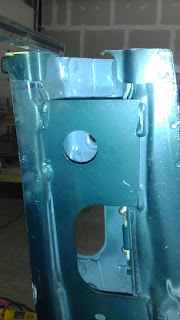
4.Remove the all four doors/front fenders/hood and headlight surrounds/bumper cover/ bumper from the front of the car. A couple of guys have asked if the doors can stay on...I guess they can be cut while on the car but alll the inner panels and the plate that holds the motor etc needs to come out..as well as the glass.
5. Remove the engine/trans/radiator according to the bentley.
6.Remove the computer and wiper assemblies from under the windshield area...this is where we are cutting so clear it out well. You don't have to disconnect every wire and connector if you don't want to but the stuff all has to be out of the area before the saws all is used for the cut.
7. remove the windshield(or at least the lower foot of it. You are going to need to reach behind the dash.
 |
| when loosening the dash bolts there is one really tough one to get to...if the windshield is gone it is easy...we just poke through sometimes |
 |
| dont mess with the strut tower...we use the whole thing with just a bit of trimming |
 |
| this is what is behind the dash on the passenger side |
 |
| the passenger lower corner of the jetta windshield |
 |
| the seam running left to right about 4" from the bottom of the windshield is where we cut |
 |
| This stamped support is in the way and must be unbolted(black part) |
Also you have to remove the brace above the pedals under the dash...this little brace runs over the two pedals and keeps the dash from dropping low.
 |
| this steel stamping and aluminum crash section comes out...I trim the front two sides of the tab and bend it rearward |
At this point you have to look at the mileage of the car and decide whether you want to change the heater core...much easier to do now while all is apart. In general the go about 180k miles or so...then they begin to put a haze on the inside of the windshield.
9. Make your rough cuts at the front base of the windshield first, the door shut pillar area second, and the rear seat area and remove the top/rear of the cars sheet metal. When you cut the rear seat area have a jack under the rear of the car as it will want to fall rearward
 |
| Inside view of center door shut pillar rough cut |
 |
| Rear box section under seat rough cut...notice the nut retainers and doubler plates that you want to stay clear of |
 |
| after the car is level move the laser up to the top of the door hinge area |
 |
| Front door hinge area final cut..the inside sill is straight down and on the inside of the door pillar...flat area where the trim was and a great spot to measure from |
|
 |
| Dash top side area final cut line...this is inside of the door hinge top area |
|
 |
| the three bolts are the main dash supports |
 |
| we provide a laser cut top for the strut tower area box section |
 |
| Dash trough final cut |
Make sure you have disconnected all the wires that go to the roof area like the radio and sunroof controls..lights, etc. you may decide to use some of these circuits in your build. I cut as little wiring as i can...you just never know when the ground in the roof was used for something else...
keep the harness in tact.
10. Remove the trunk surround and the trunk. The cut for the trunk surround is tricky at the top by the base of te rear window. I find it easier to remove or smash the rear glass to get it out of the way for the cut. The pictures are good but that cut under the top area is a bear. Go slow. The saws all eats metal well...no need for speed here. A nibbler or die grinding wheel would work well here as well. The rest of the trunk is easy.
 |
| This is the forward corner of the trunk. The white line is at the top of the bend exactly where the rear window lower edge used to be...cut along this edge with a shallow cut at a flat angle. |
 |
| Another shot of the leading edge of the trunk area under the rear window(now removed), the white line goes left to right at the top of the bend |
 |
| This is how the final lower section of the trunk surround looks as it will be installed on the g3f...we use the 1" flange left on the lower edge to mount it to the car. |
 |
| This is the rear seat area and the largest cut. The rough cut needs to be above the white final cut lines. Yellow lines are dimensions not cuts. cut straight along left above the final cut lines a few inches. |
11. Fine cut the front/middle/rear. Laser level the floorpan left to right and front to back using the bottom of the doors sill.

 |
| the inside markings of the 1.75" final door jamb cut this cut is about 1/4" higher than you need but you can always trim more later...dont go below that top edge of the inner stamped plate with the big hole! |
|
 |
| The marking of the final door jamb cut outside surface...use the centerline of the door bolt holes as the base point |


